
Setting up for the first time
The first time you open GNexusOS it walks you through a setup wizard. This page goes through it one screen at a time, so you know what each one is asking for and why.
Before you start: get an API key
You cannot use GNexusOS without an AI provider key. This is the one thing worth sorting out before you sit down to set up, because the app will stop and wait for it.
GNexusOS does not sell you AI usage. It runs on a key you get yourself, directly from an AI company, and you pay that company for what you use. Nothing routes through us and we take no cut.
These are the providers the setup screen offers:
| Provider | Model it suggests | Needs a key |
|---|---|---|
| Anthropic | claude-sonnet-4-6 |
Yes |
| OpenAI | gpt-4o |
Yes |
| OpenRouter | anthropic/claude-sonnet-4-6 |
Yes |
| Google AI (Gemini) | gemini-2.5-flash |
Yes |
| Groq | llama-3.3-70b-versatile |
Yes |
| Ollama | — | No — runs on your own machine |
| Custom Provider | — | Yes |
Pick one, make an account with them, and create an API key. Keep the page open — you will paste the key in a moment, and most providers only show it once.
Ollama is the exception. It runs AI models on your own computer, so there is no key and no bill. It has to be installed and running before GNexusOS can use it, and the models are smaller than the paid ones.
Step 1: Create your account
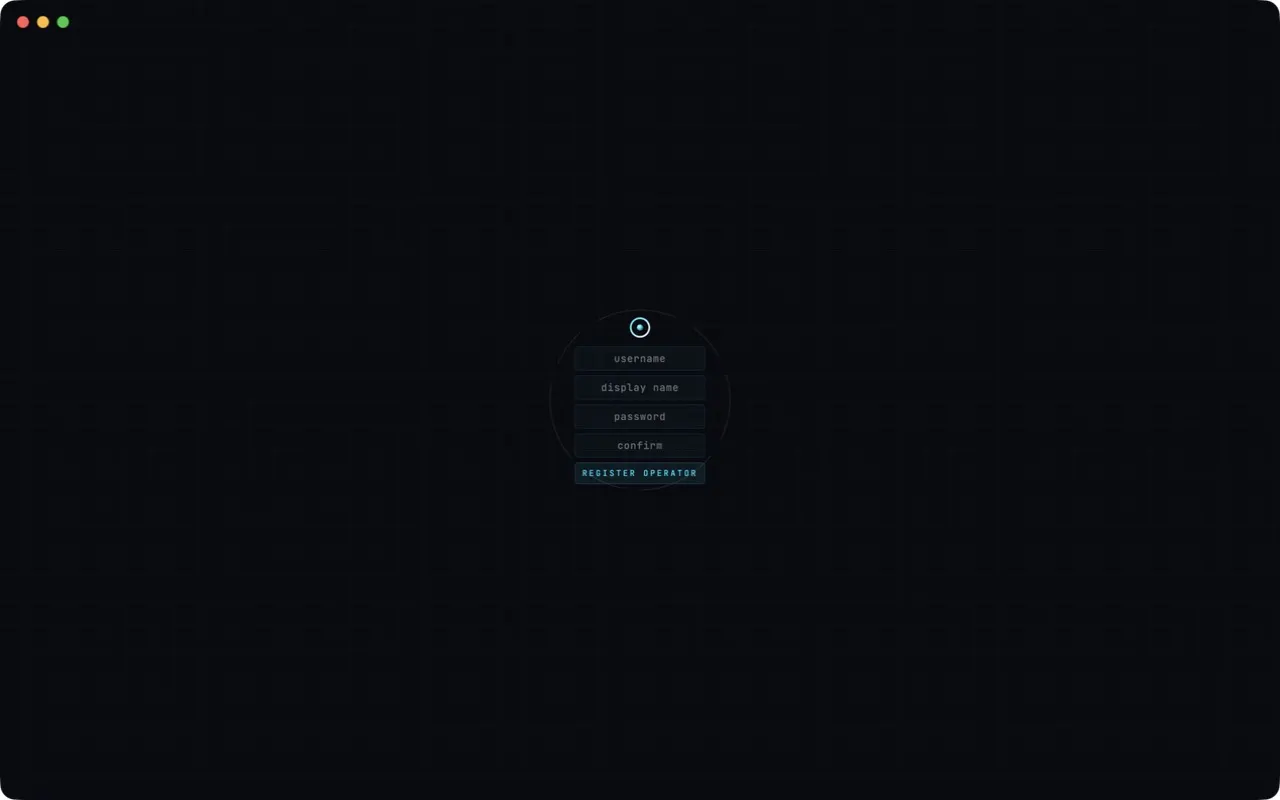
The first screen asks you to register an operator. "Operator" just means you — the person in charge of this copy of GNexusOS.
Fill in a username, a display name and a password, then choose REGISTER OPERATOR.
This account is local. It is stored on your own machine, in this workspace's folder. It is not an online account, it is not the same as your account on our website, and we never see it. If you forget this password, there is no "forgot password" email — the account lives only on your computer.
Step 2: The welcome screen
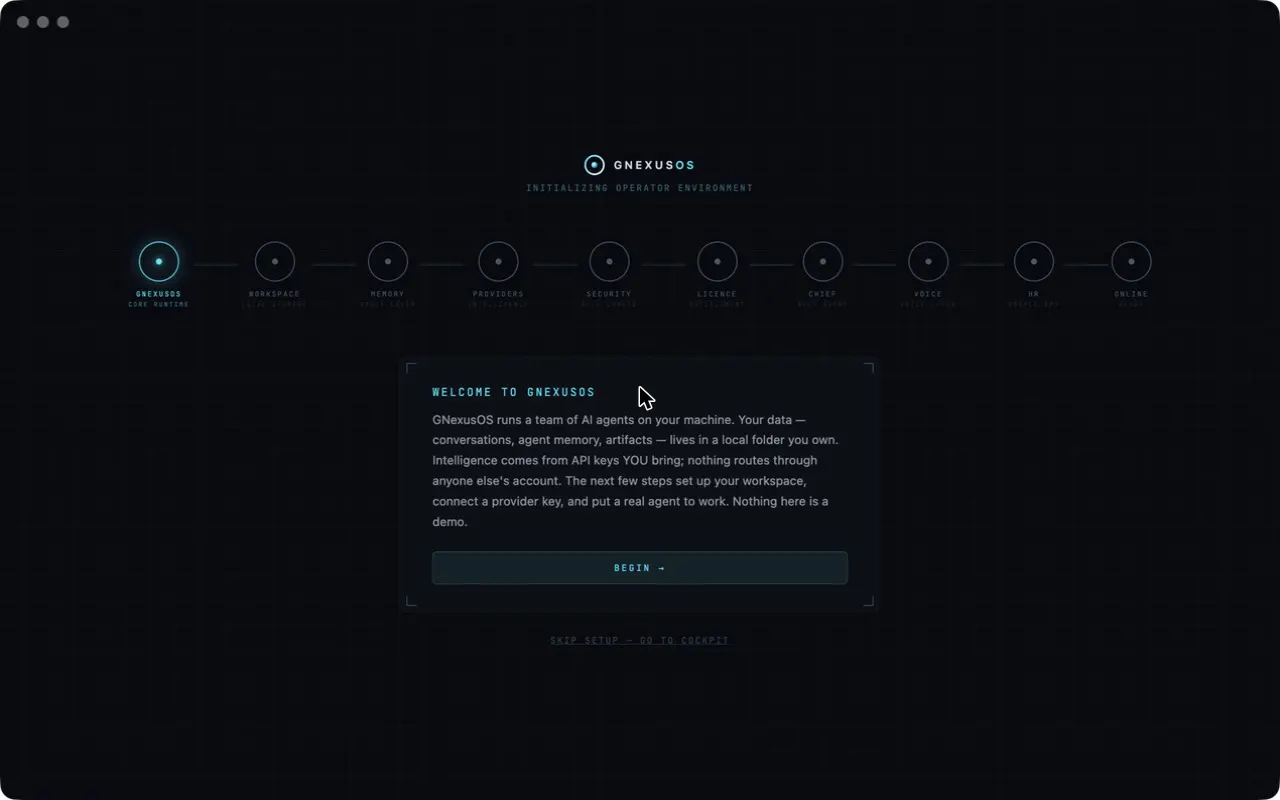
You now see the ten stages of setup across the top of the window. They fill in as you go, so you can always see how far along you are.
Choose BEGIN to start.
There is also a SKIP SETUP link at the bottom. It is worth knowing it exists — but skipping does not get you into a working app, because the provider key and the licence are both required anyway. It is better to go through the wizard.
Step 3: Choose where your files live
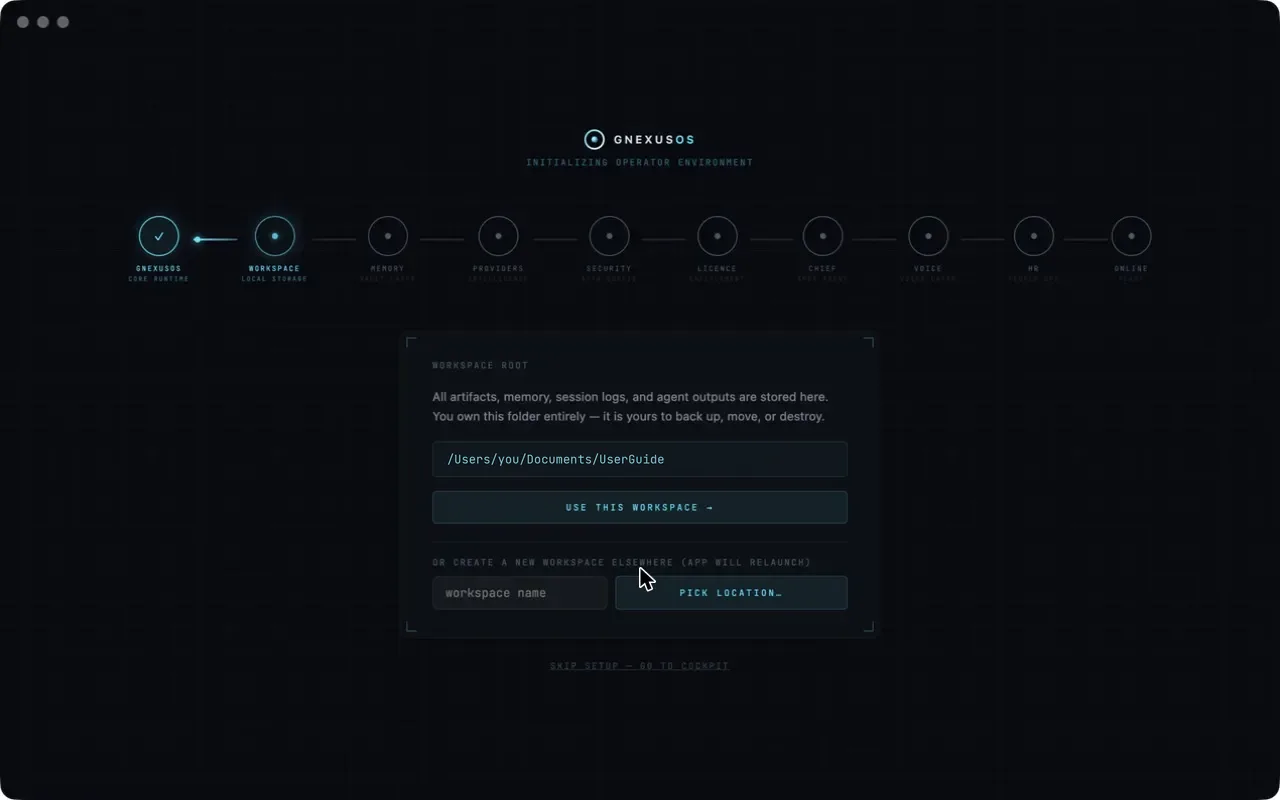
This screen picks the workspace — the folder on your computer where everything GNexusOS does will be saved.
It suggests a folder. Choose USE THIS WORKSPACE to accept it, or name a new one and choose PICK LOCATION to put it somewhere else.
This folder is yours. Everything lives in it, you can back it up like any other folder, and if you delete it, it is gone. Somewhere in your Documents folder is a sensible choice. Avoid putting it anywhere that syncs aggressively to the cloud if you would rather it stayed on your machine.
Step 4: Set up your memory manager
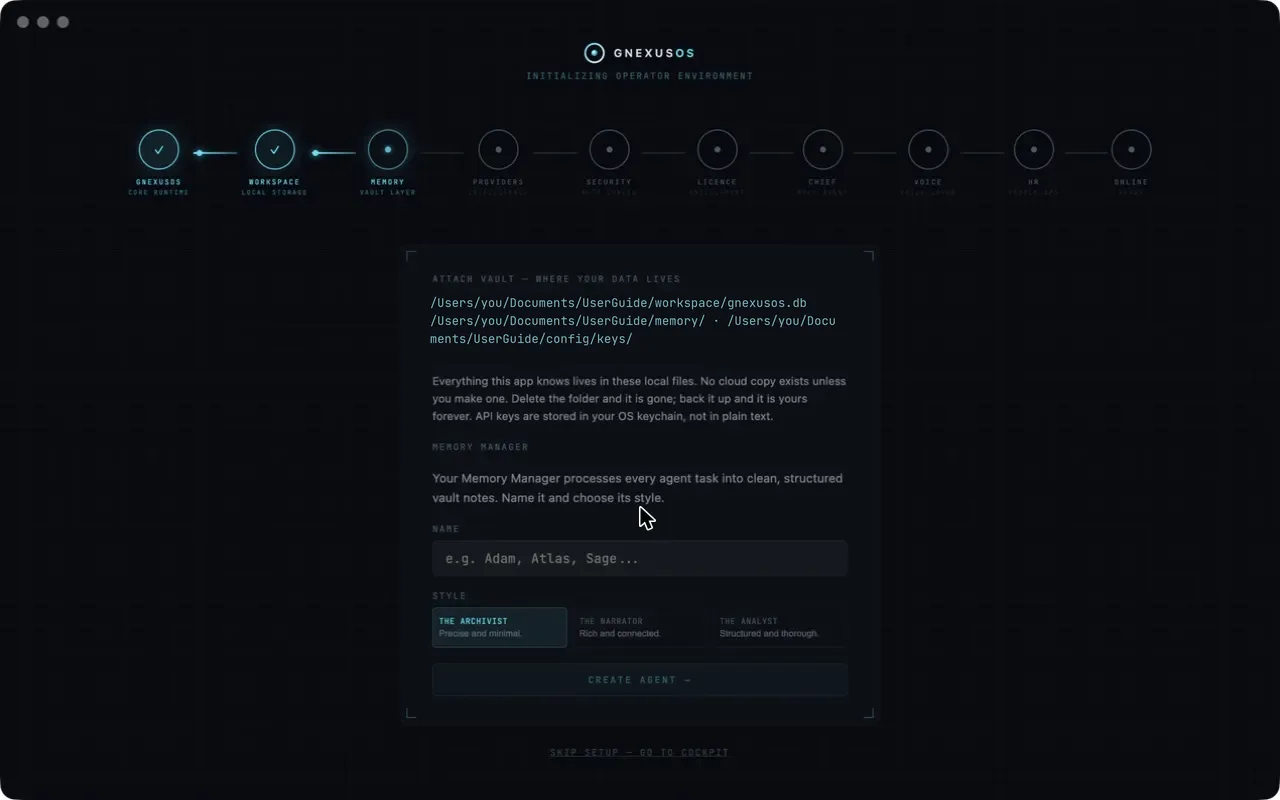
Two things happen on this screen.
The top half tells you exactly where your data goes. Three paths, all inside
the folder you just chose: a database file for your work, a memory folder, and
a config/keys folder. Read them — this is the clearest statement in the whole
app of where your information lives.
The bottom half creates your first agent. The memory manager is the agent that tidies up after the others: it turns finished work into organised notes you can search later.
Give it a name — anything you like — and pick a style:
- The Archivist — precise and minimal. Short, factual notes.
- The Narrator — rich and connected. Notes that link ideas together.
- The Analyst — structured and thorough. Longer, more organised notes.
If you are not sure, The Archivist is the safe choice. You can change it later.
Then choose CREATE.
Step 5: Connect your AI provider
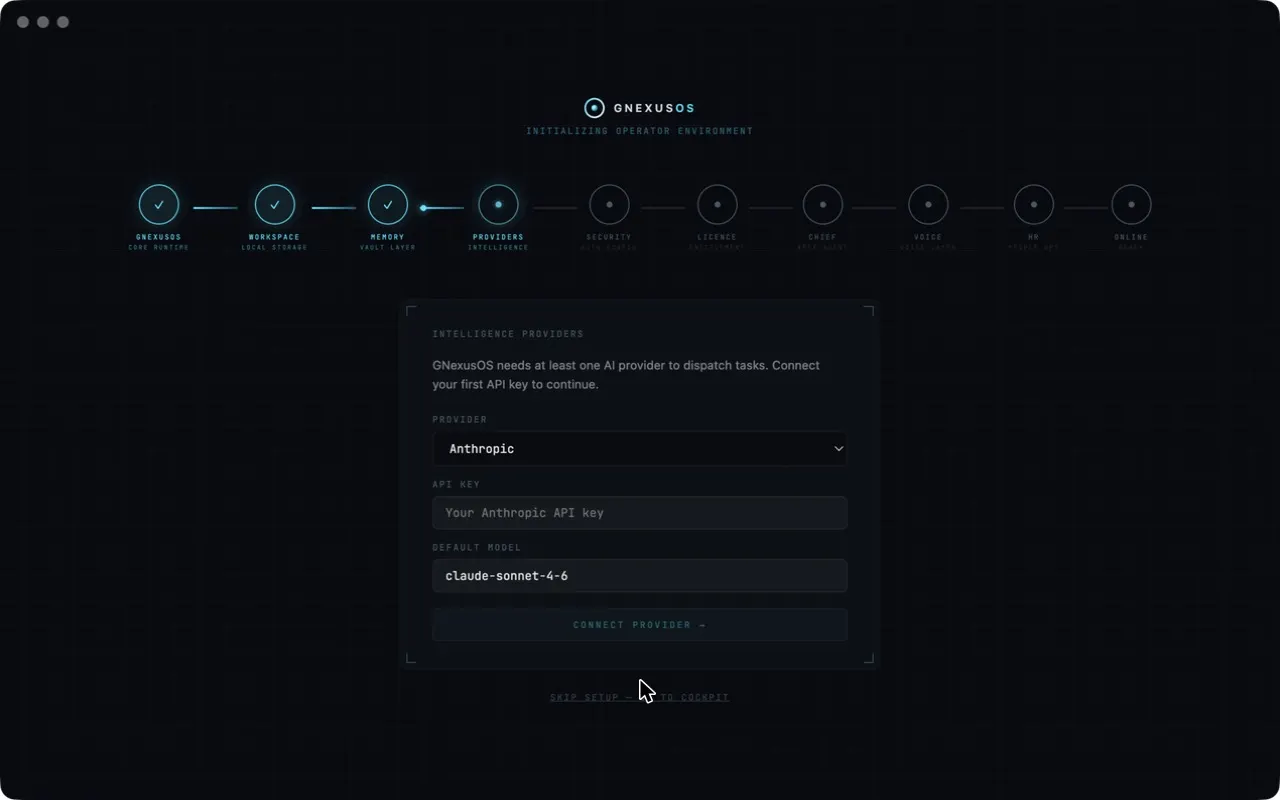
This is where the key from the start of this page goes.
- Pick your Provider from the list.
- Paste your API Key.
- Leave the Default Model as it is unless you have a reason to change it.
- Choose CONNECT PROVIDER.
If you picked Ollama, the API key box disappears, because a local provider does not need one.
This key is stored in your computer's own secure storage — the Keychain on macOS, the Data Protection API on Windows — not in a plain file, and never on our servers.
If it will not connect
The app checks the key straight away, so you will know immediately.
- "provider unavailable" with Ollama means Ollama is not running on your machine. Start it and try again.
- A rejected key usually means a copy-and-paste problem — a missing character, or a space at the beginning or end. Copy it again.
- Some providers need billing set up before a key works at all, even a brand new one.
Step 6 onwards
The remaining stages — security, licence, your main agent, voice, and the finishing checks — follow the same pattern: each one explains itself and has a single button to continue.
Two of them will stop you if something is missing, and both are meant to:
- A provider must be connected. Without one, no agent can do any work.
- A licence must be valid. Without one you will see "No agent can be hired because this workspace has no valid licence" when you try to create an agent.
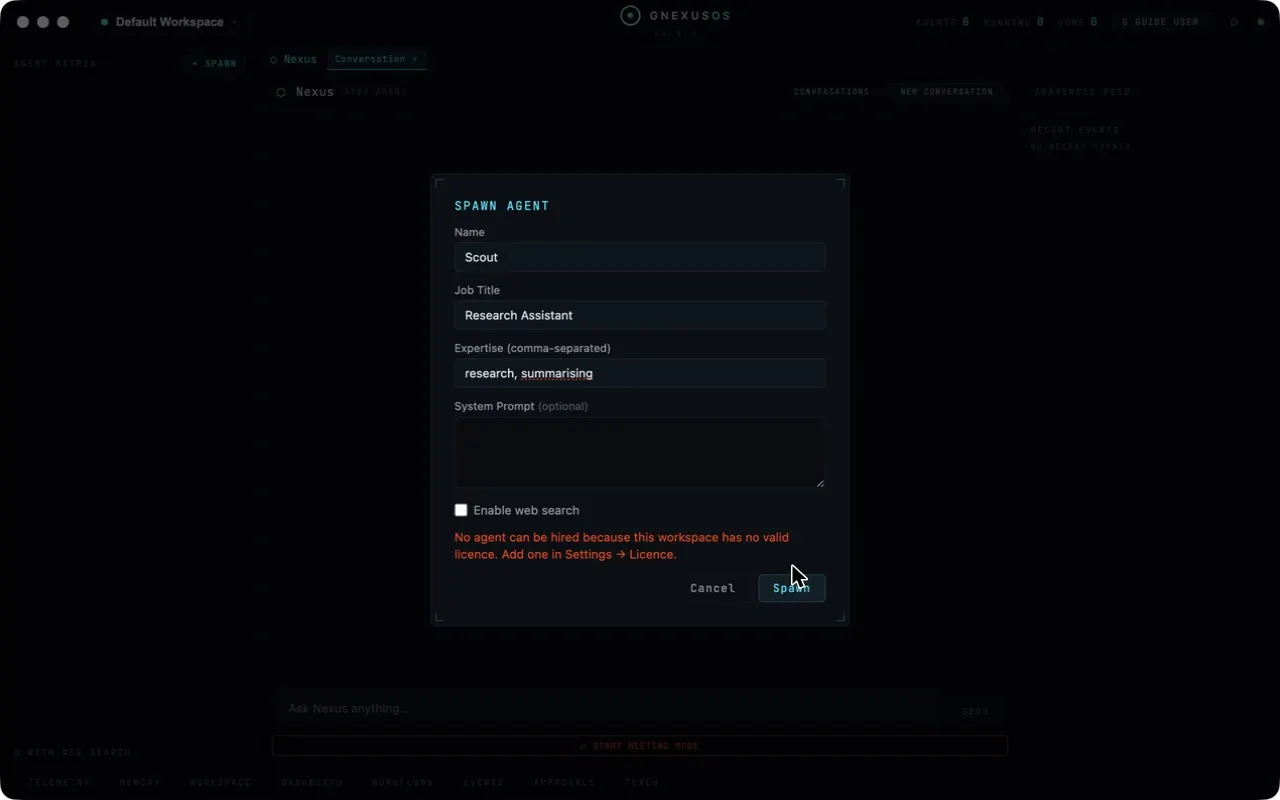
Your licence key arrives by email when you buy. Adding it is covered in Your licence key, and what a licence covers is set out in the Terms of Service.
What the app looks like when setup is done
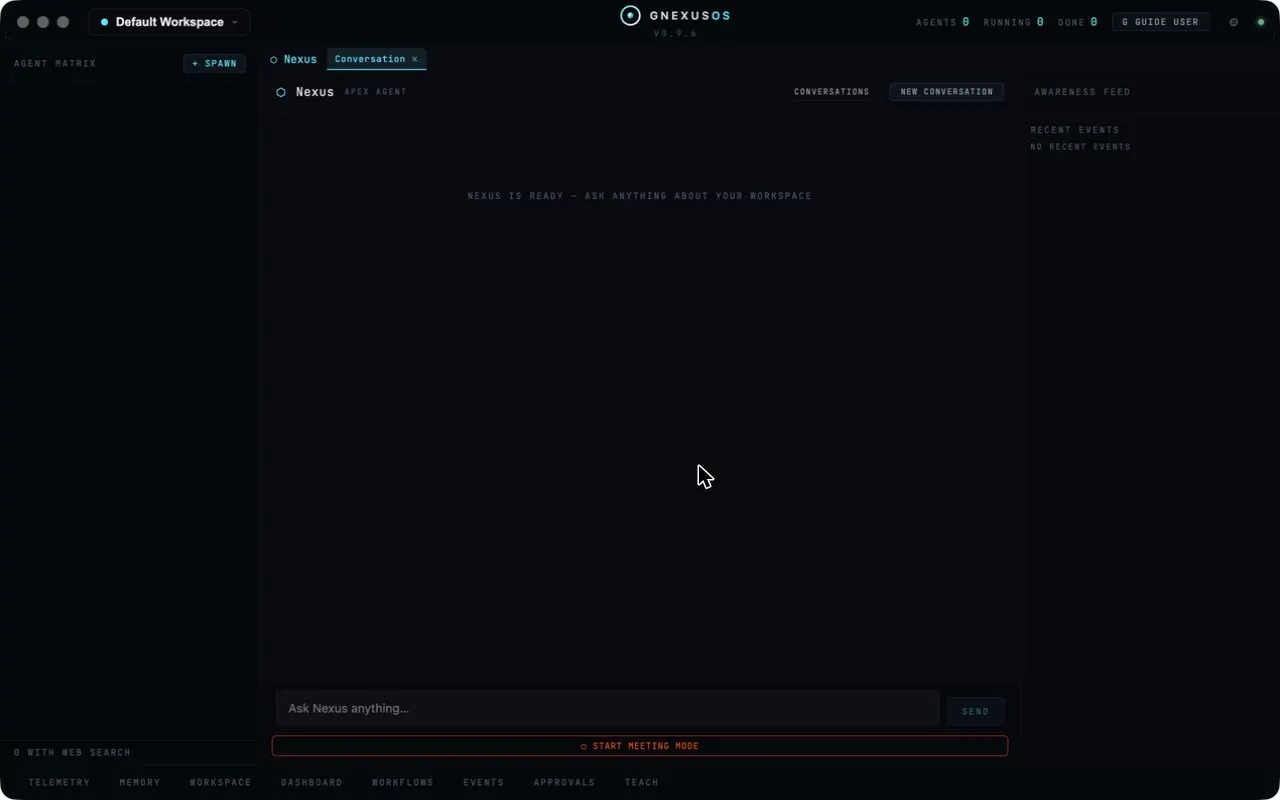
This is the main window. It is empty to begin with, which is normal.
- Down the left is the agent matrix — your agents appear here as you create them.
- In the middle is the conversation with your main agent, the one that organises the others.
- Down the right is the awareness feed, showing what has been happening.
- Along the bottom are the other areas of the app: telemetry, memory, workspace, dashboard, workflows, events, approvals and teach.
Creating your first agent
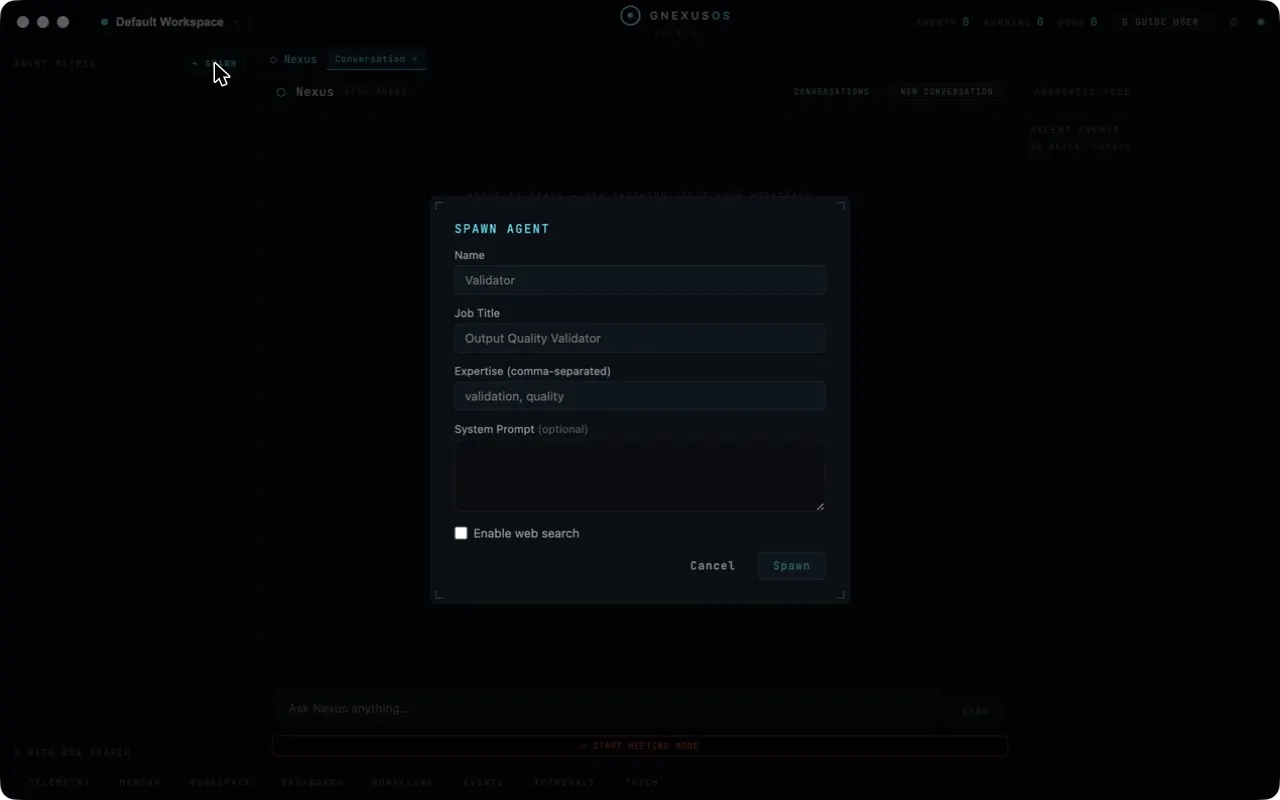
Choose + SPAWN at the top of the agent matrix. You are asked for:
- Name — what you want to call this agent.
- Job Title — what it does, in a few words.
- Expertise — a few comma-separated areas it should be good at.
- System Prompt (optional) — extra standing instructions.
- Enable web search — whether it may look things up online.
Think of it as writing a very short job description. The clearer you are about what the agent is for, the better its work will be.
Starting setup again
You can re-run the whole wizard at any time from Settings → Workspace, where there is a RE-RUN button for the first-run setup.
Creating a brand new workspace also starts you fresh, with its own separate account, agents and data. That is useful for keeping unrelated work apart — one workspace per client, for example.